Instagram

Instagram

Thursday, April 12, 2012

My first trial of kurumie/oshie

After the attempt to make some bookmarks with washi doll on it, now I'm trying to make another japanese washi paper doll, kurumie or oshie. Basically you just cut out the paper out of the pattern and wrap each part of it with washi paper by adding thin sponge/foam in between. After you wrap all the fragment, then you have to put all the part together like doing a puzzle, simple isn't it?

Noooo!! because, first you need a pattern to do it, and after that solved, then you have to wrap all those tiny miny little part of it that can make your fingers tangled :). After I googled up and down I can't find any single patterns of kurumie, so I decided to take a picture of kurumie and copy paste it to words with a little adjustment to my desired size, and then I printed it. After that I traced the picture with my handphone stylus to the cardstock, then I draw the line along the embossed pattern with pencil, voilaaaa, here's my pattern :).

I know I should used carbon paper to trace the pattern, but at that time I didn't have any so I just use anything available around me :P.

And here's my creations .....

The pattern :)

My first kurumie, forgot to add the background, too serious making on it :)

Now it has a background :)

Card for Nara the birthday boy!

My lovely nephew Nara will celebrate his 5th b'day in April 10th 2012 (yes, I made this card on April 4th but too lazy to post it) and I promise to make a card for him.
Card for boy rather difficult to make in term of choosing the embellishment since you can't throw bunch of flowers' butterfly like for the girls. So here what I came up with :)

Please excuse the blue-ish foto, I must have push some button in my handphone :)
I use tracing paper for the front cover


Add some boy and balloon punch out

Use doily paper for the sentiment

Made some tag for him :)

Here's the final result.

Warabe Ningyo (Japanese Bookmark)

I've been into Japanese washi doll lately, first encounter with the paper, I definitely in love with that handmade paper, the texture, the image, all so breathtakingly cute. So, after back and forth googling find the tutorial on how to do it, finally managed to create these, enjoy :)


Tuesday, March 20, 2012

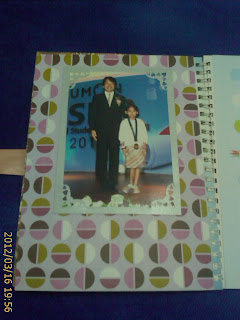
Mini scrapbook album from used desk calendar

I never made any scrapbook before.
Until one day I took a peek in youtube on how to make scrapbook album from envelope, from paper bag and so on and so forth. So here it is, last year desk calendar stood before me, and I thought, Heyy, this can be something useful for scrapbook since it has ring binder and hard cover, perfecto!!.

So I cut some wrapping papers ( I don't have any of designed or patterned papers, pity me *LOL*) and start my venture with the calendar. So here what I came out with.


So you have pocket with the excess paper from the cover.

Glue a ribbon (also in the back) as a lock for the book


This for the girl, she added wooden peg and girl punch outs

And this is for the boy :)


Frugal (or thrifty??) crafter

Since almost all the card making supplies come from US, hence consequently the price also way beyond from its nature. Therefore I always look forward if those item can be replaced by DIY one :).

Thanks to Mr Google, I found out how to make your own baker's twine and how to make your own glimmer mist beside my handmade stamp. So this is what I came out with.

Tadaaaaa, my handmade baker's twine.

Need to apply the marker longer on the twine so will get even color all way long.
And my handmade glimmer mist. I changed the materials a bit from the video since I didn't have pearl or metallic acrylic paint and mod podge, but I DO have pearl glue. So here it is, just add water (warm water is better so the solution will mix thoroughly) and the glue in the spray bottle ( I bought in Mr D.I.Y for just RM 0.90),shake it until all the glue dissolved in the water, and voilaaaa, you have your own glimmer mist.


Pardon the camera quality and the lighting, but I'm very satisfy with the result
The only problem is the opening of spray nozzle is too big so it created big droplets. Need to find good spray bottle now.
So, do you have some way to make something on your own?. Share it with me, I will be more than glad to hear it.

Wooden peg card

One of the hidden treasure I found in Mr D.I.Y is wooden peg that comes in various shape and colors, and of course make them very cute. And I can't resist the urge to buy them *LOL*.

Here are some of the wooden peg I bought.

All for only Rm 1.80 :)


Not wooden peg but shape paper clip.

Not wooden peg, but also made from wood :)
I think I can use them someday for scrapbook or card
And this is the card I make using the wooden peg, with insight from Mbak Yulis on Ana Linda suggestion.


Which one nicer? first or second card? (notice the flower position).